

Table of contents
Android Jetpack's Navigation component helps you implement navigation, from simple button clicks to more complex patterns, such as app bars and the navigation drawer.
In this article, we will learn how you can Implement the Navigation component in a complex(maybe) UI flow.
Here, we will see the use of ACTUAL NESTING of the Navigation component and not just grouping some flow in one graph. Even if you are a beginner you can still read this article, I will explain everything in detail.
To include Navigation support in your project, add the following dependencies to your app's build.gradle file:
dependencies {
  def nav_version = "2.5.3"
  // Kotlin
  implementation "androidx.navigation:navigation-fragment-ktx:$nav_version"
  implementation "androidx.navigation:navigation-ui-ktx:$nav_version"
}
The Navigation component consists of three key parts:
Navigation graph: An XML resource that contains all navigation-related information in one centralized location.
NavHost: An empty container that displays destinations from your navigation graph.
<androidx.fragment.app.FragmentContainerView android:id="@+id/nav_host_fragment" android:name="androidx.navigation.fragment.NavHostFragment" android:layout_width="0dp" android:layout_height="0dp" app:layout_constraintLeft_toLeftOf="parent" app:layout_constraintRight_toRightOf="parent" app:layout_constraintTop_toTopOf="parent" app:layout_constraintBottom_toBottomOf="parent" app:defaultNavHost="true" app:navGraph="@navigation/nav_graph" />NavController: An object that manages app navigation within a
NavHost.Get the instance of NavController by using:
findNavController()
Our Goal:
Using Navigation between Fragments that are created on top of one activity is a very easy task. If you can new to this thing, you can check out the basics of Navigation components.
I am supposing that you know how to use a Navigation graph with fragments in one graph, but what about nested graphs?
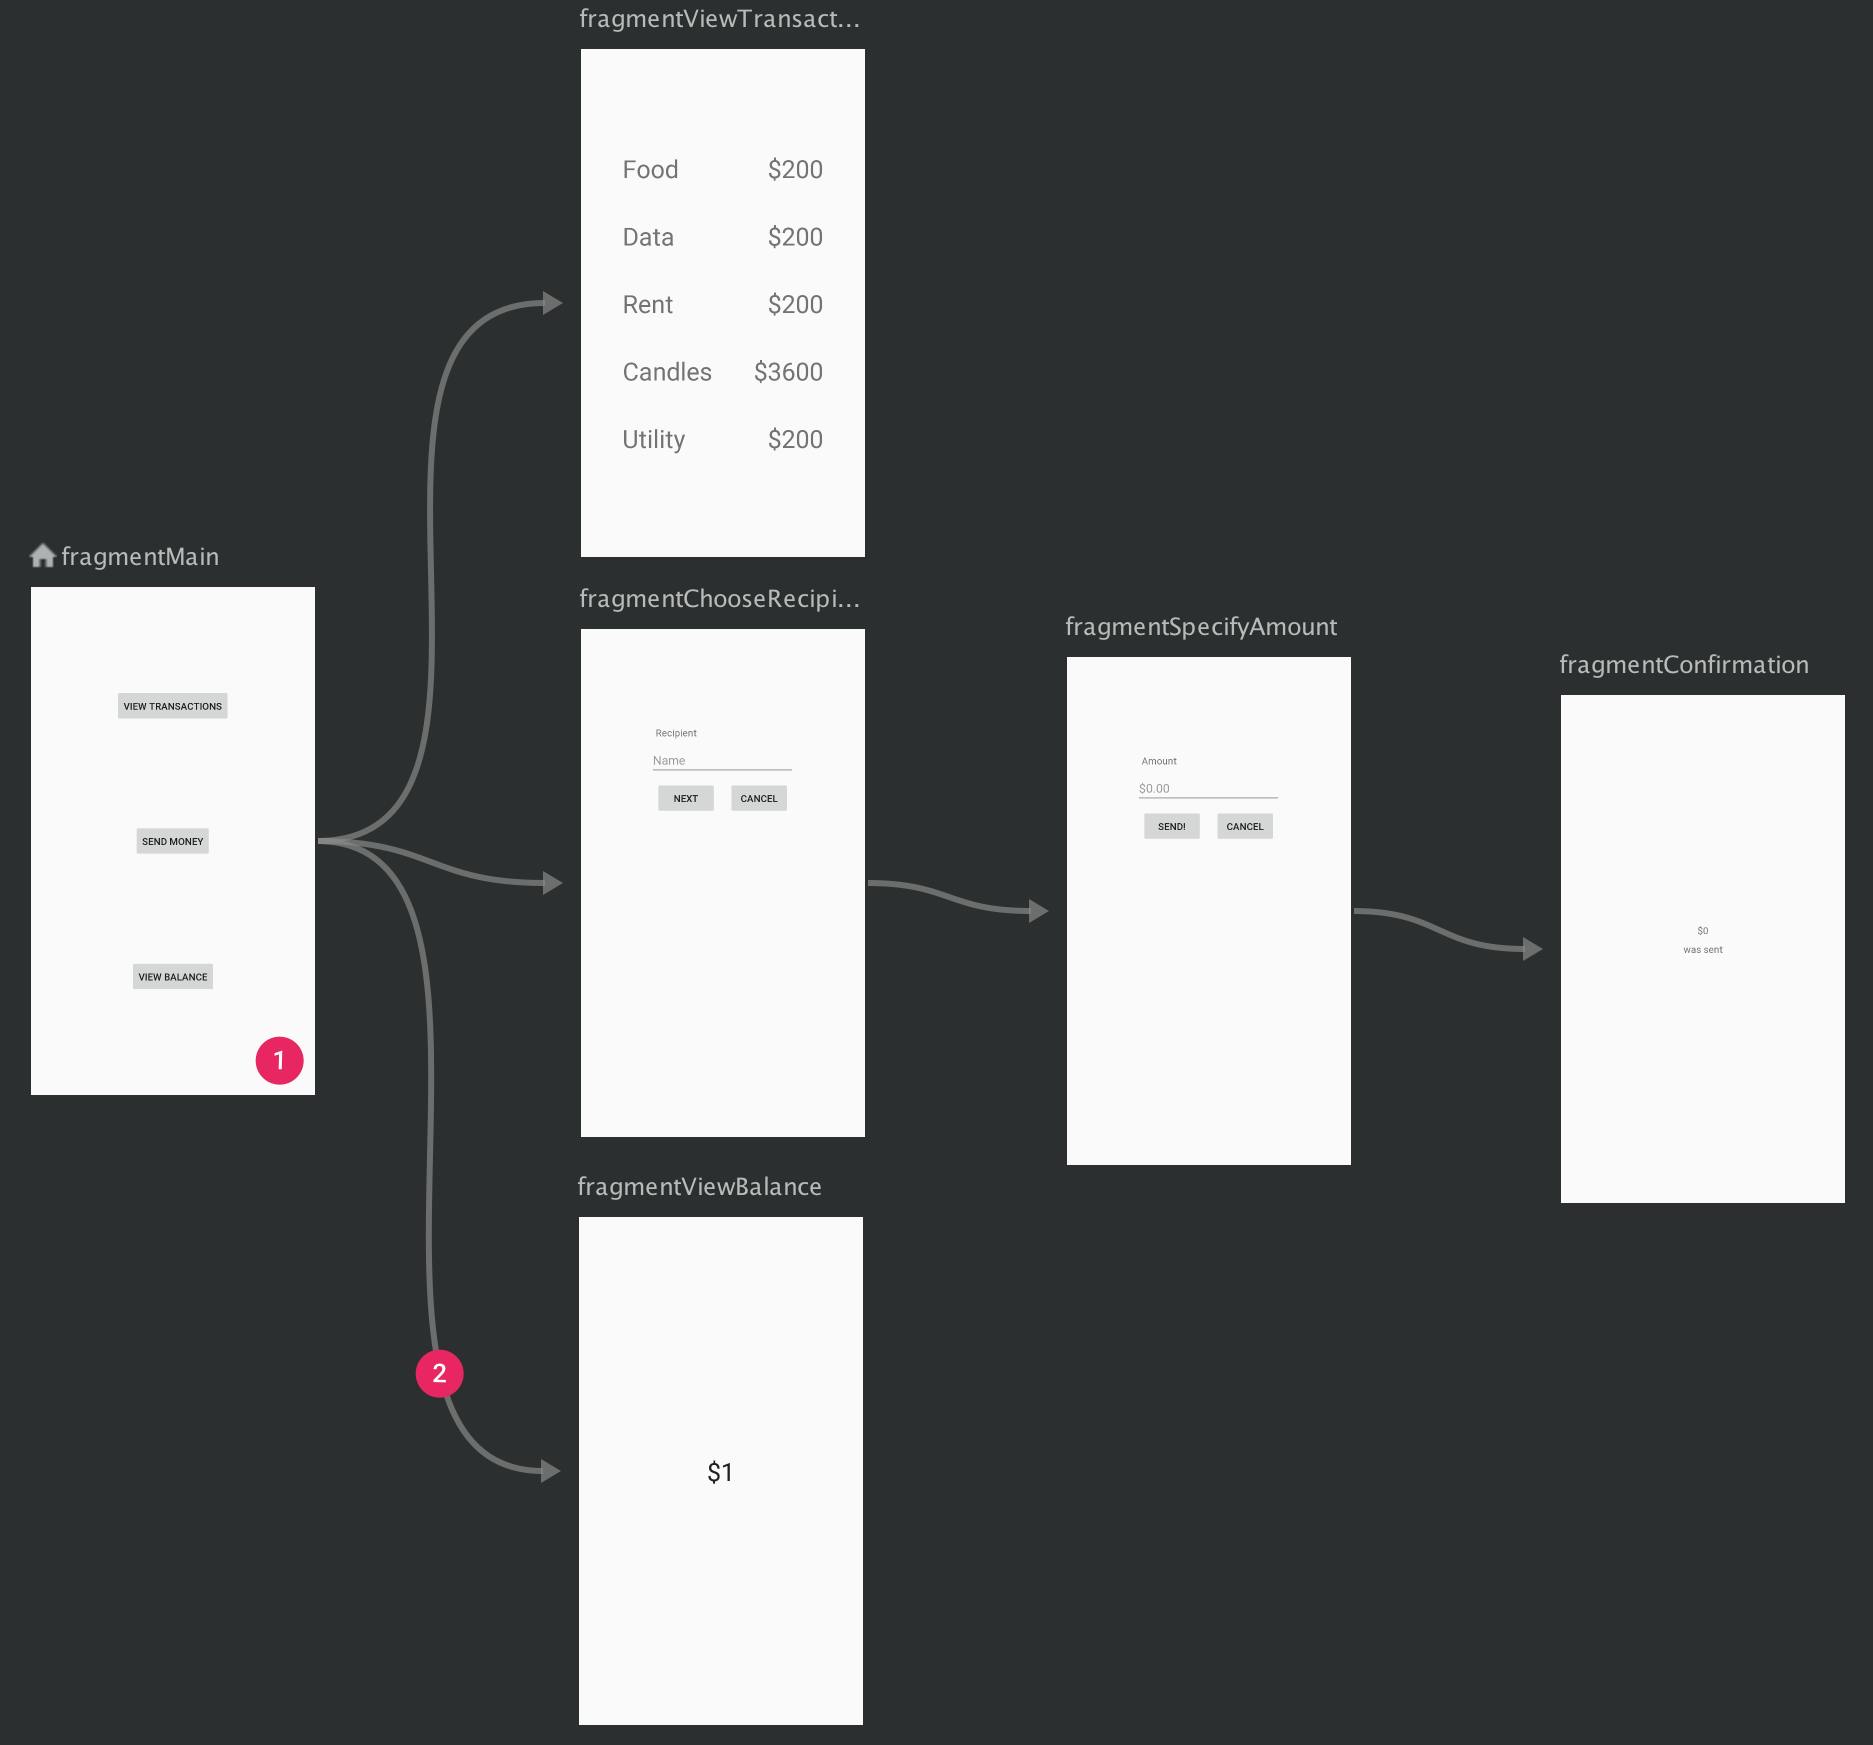
In official docs: A series of destinations can be grouped into a nested graph within a parent navigation graph called the root graph. The nested graph encapsulates its destinations.
IMO, that IS NOT NESTING!! This is just grouping, right?
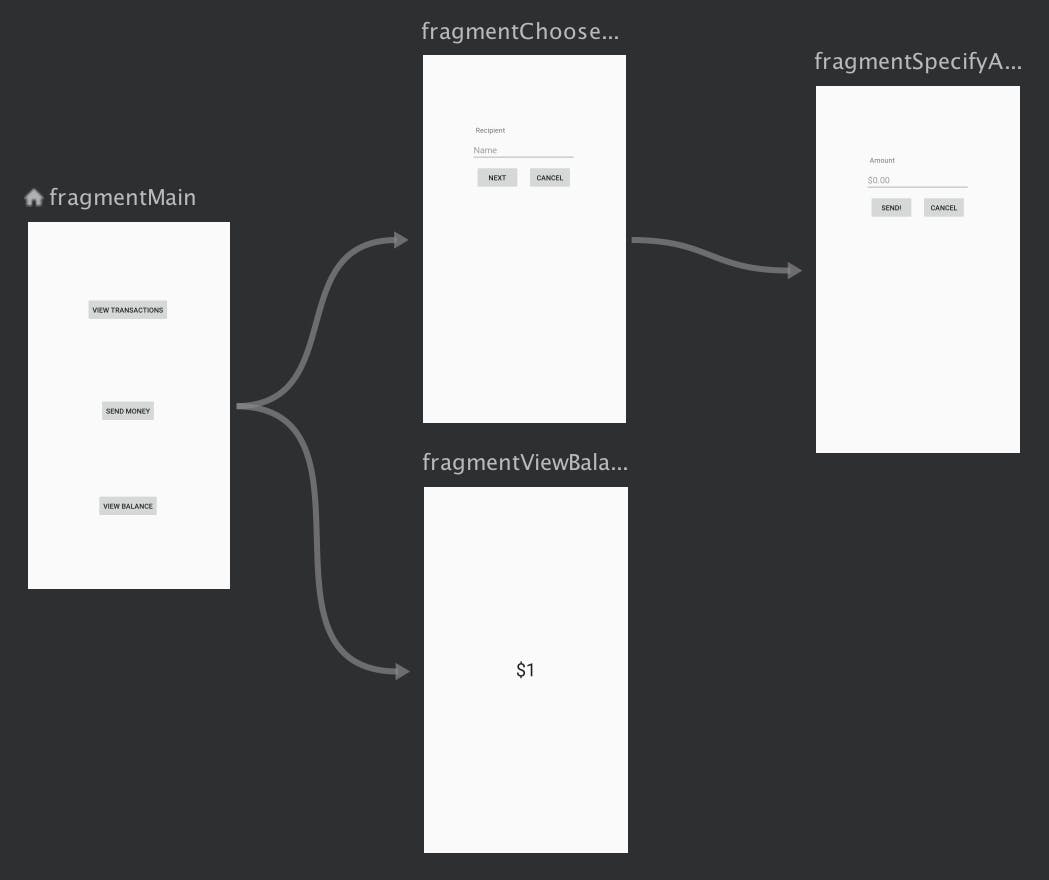
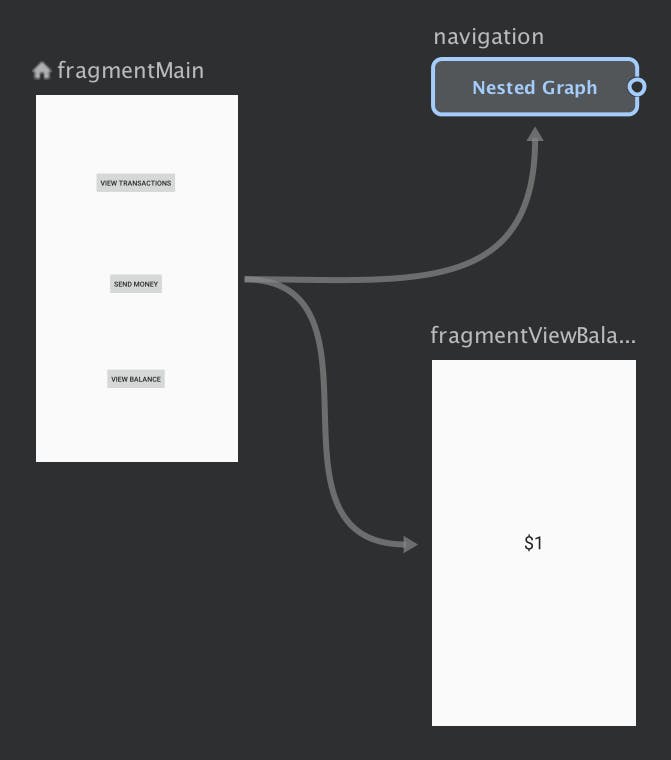
Here, you can see we just grouped some of our destinations to make our code look cleaner. But this was not my requirement!
What I wanted:
Create a main Graph with three fragments. A and B and C
In the C fragment use a bottom bar.
A small part of C fragment will be our NESTED graph.
That part of the C fragment will show the 3 tabs from BottomBar.
Switching between Tabs will not change C but only part of C that have the Nested NavGraph.
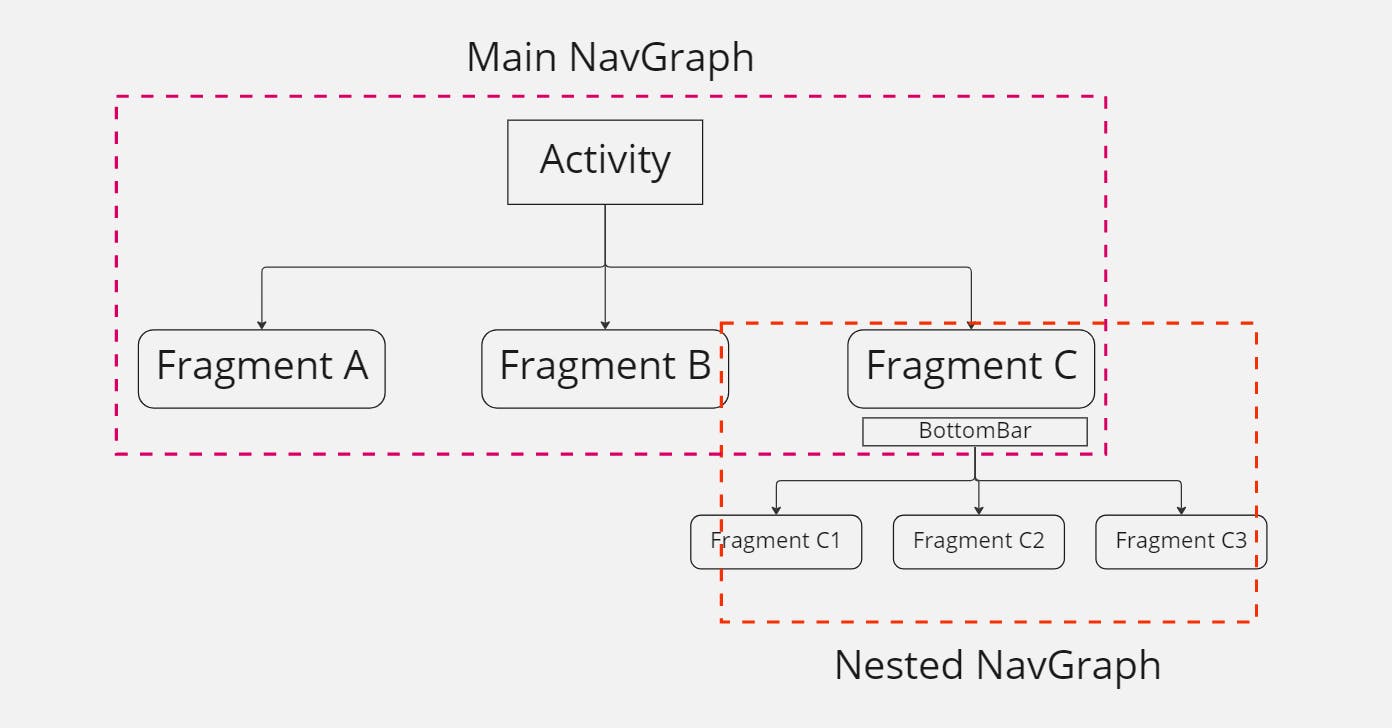
In our design it will look like:
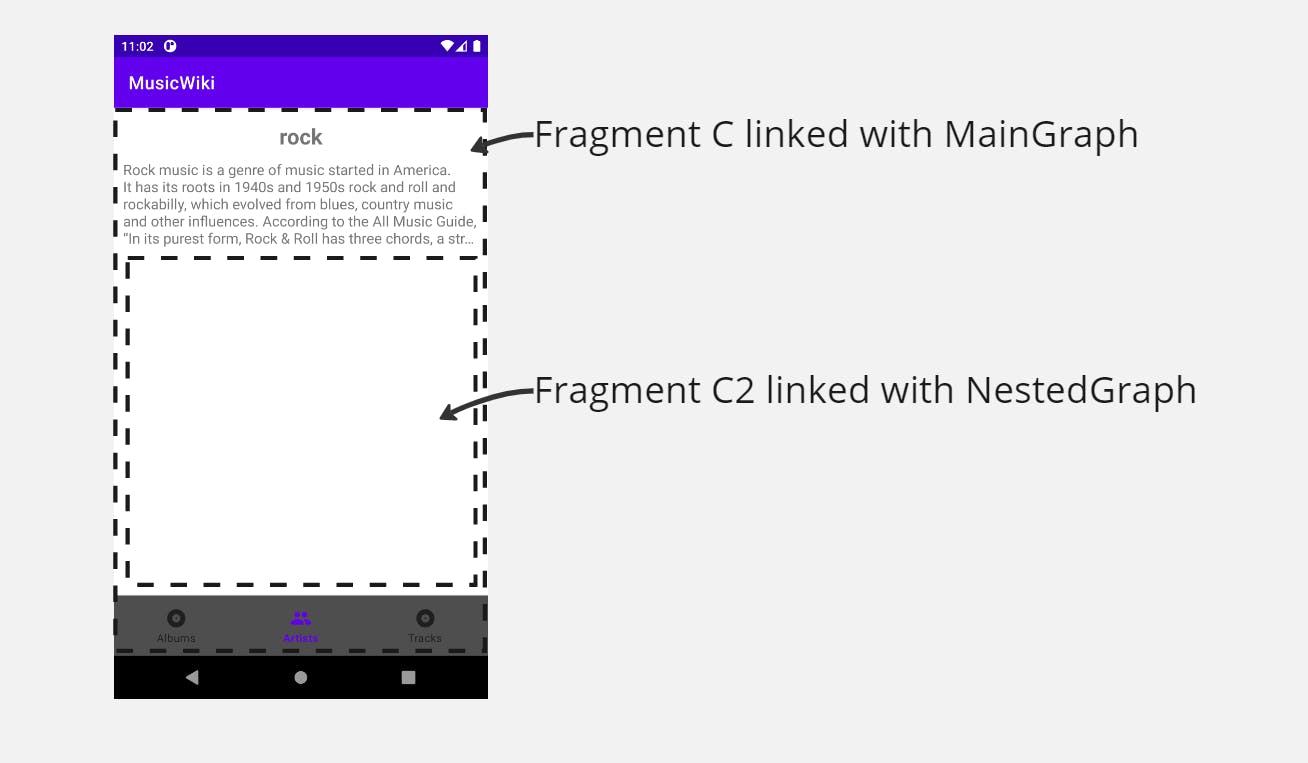
Implementation:
Add a Container in the MainActivity layout.
    <androidx.fragment.app.FragmentContainerView
        android:id="@+id/main_fragment_container"
        android:name="androidx.navigation.fragment.NavHostFragment"
        android:layout_width="0dp"
        android:layout_height="0dp"
        app:defaultNavHost="true"
        app:layout_constraintBottom_toBottomOf="parent"
        app:layout_constraintLeft_toLeftOf="parent"
        app:layout_constraintRight_toRightOf="parent"
        app:layout_constraintTop_toTopOf="parent"
        app:navGraph="@navigation/main_nav_graph" />
Create All Main Fragments i.e. A, B, C and add them to your navigation layout file. Here, I created only 2.
Main_Nav_Graph.xml:
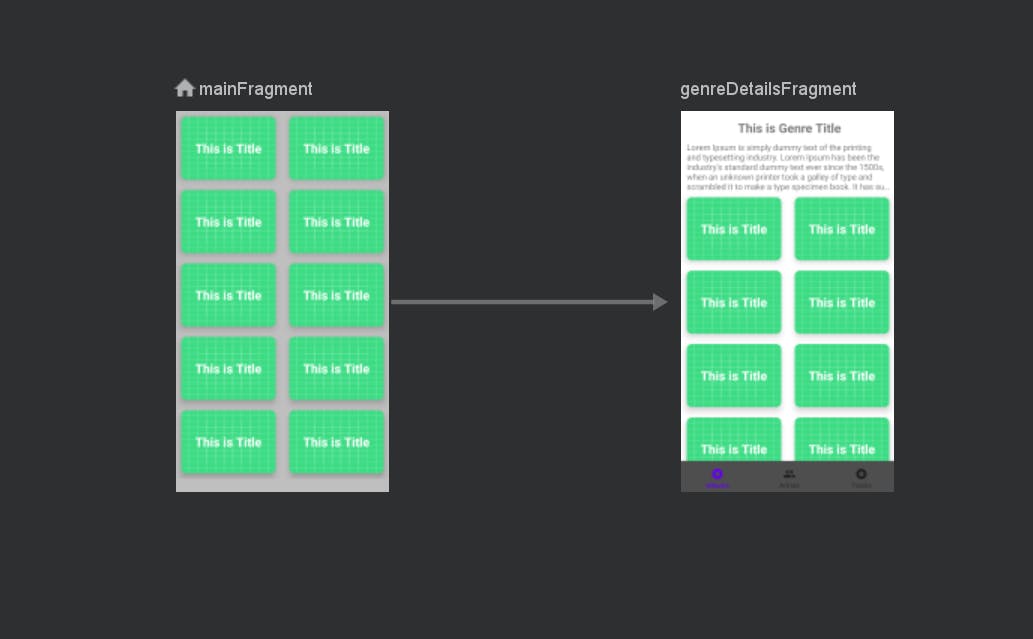
Add BottomBar(or maybe your requirement can be anything related to nested navGraph) and another Container in required Fragment. I added in
genreDetailsFragment.<androidx.fragment.app.FragmentContainerView android:id="@+id/genreFragmentContainer" android:name="androidx.navigation.fragment.NavHostFragment" android:layout_width="0dp" android:layout_height="0dp" android:padding="10dp" app:layout_constraintBottom_toTopOf="@id/bottomNavigationView" app:layout_constraintLeft_toLeftOf="parent" app:layout_constraintRight_toRightOf="parent" app:layout_constraintTop_toBottomOf="@id/genre_description_text" app:navGraph="@navigation/genre_graph" />Create nested navGraph
genre_graph: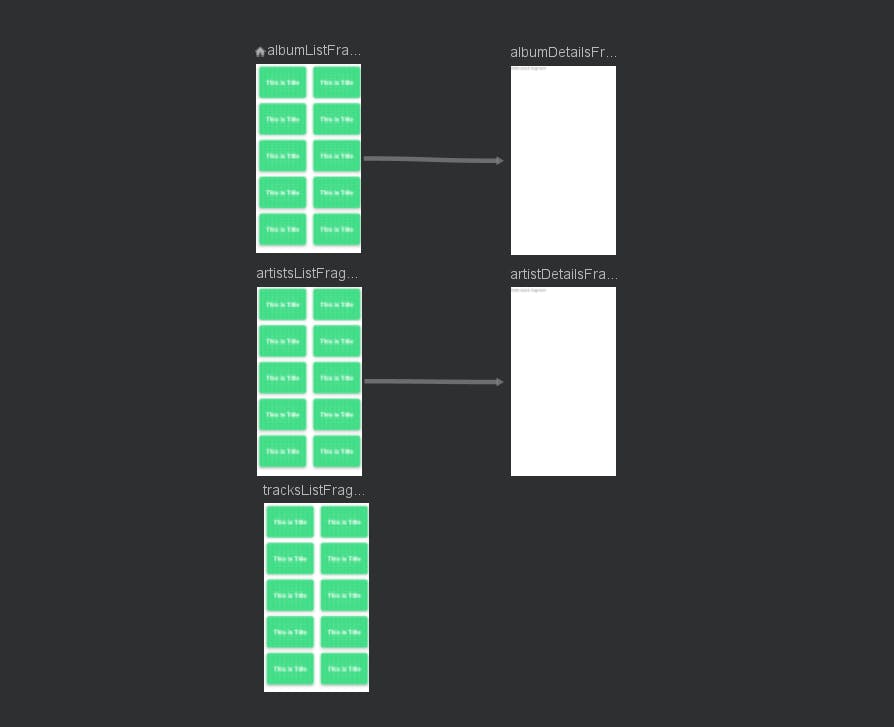
Now we want to attach this NavGraph and this was the real challenge for me! But not for you:
    val nestedNavHostFragment =childFragmentManager
    .findFragmentById(R.id.genreFragmentContainer) as? NavHostFragment
    val navController = nestedNavHostFragment?.navController!!
    view.bottomNavigationView.setupWithNavController(navController)
Here, the main part was to get the NavController corresponding to our container.
And that's it! Now you can use your NESTED navGraph successfully.
Some helpful things:
All these fragments are on the top of our single activity and hence I was using a single
ViewModel.If you want to access the instance of ViewModel in any fragment, use val
viewModel: MainViewModel by activityViewModels().Don't forget to add the respective dependency if you are not able to recognize anything.
I used Hilt for dependency Injection. Hence, also add
@AndroidEntryPointin your all Fragments.You can also pass arguments to your nested destination the same way you do with your main. I did it by using
safeargs.Use it by adding :
id 'androidx.navigation.safeargs' version '2.5.3' apply falsein your root build.gradle and other things in your module build.gradle too. I just showed you this because this is the way we have to add plugins in new Android Studio versions.
I hope you found this helpful. If yes, the do FOLLOW me for more Android-related content.
#androidWithSagar #xDaysOfAndroid #android #androiddevelopment