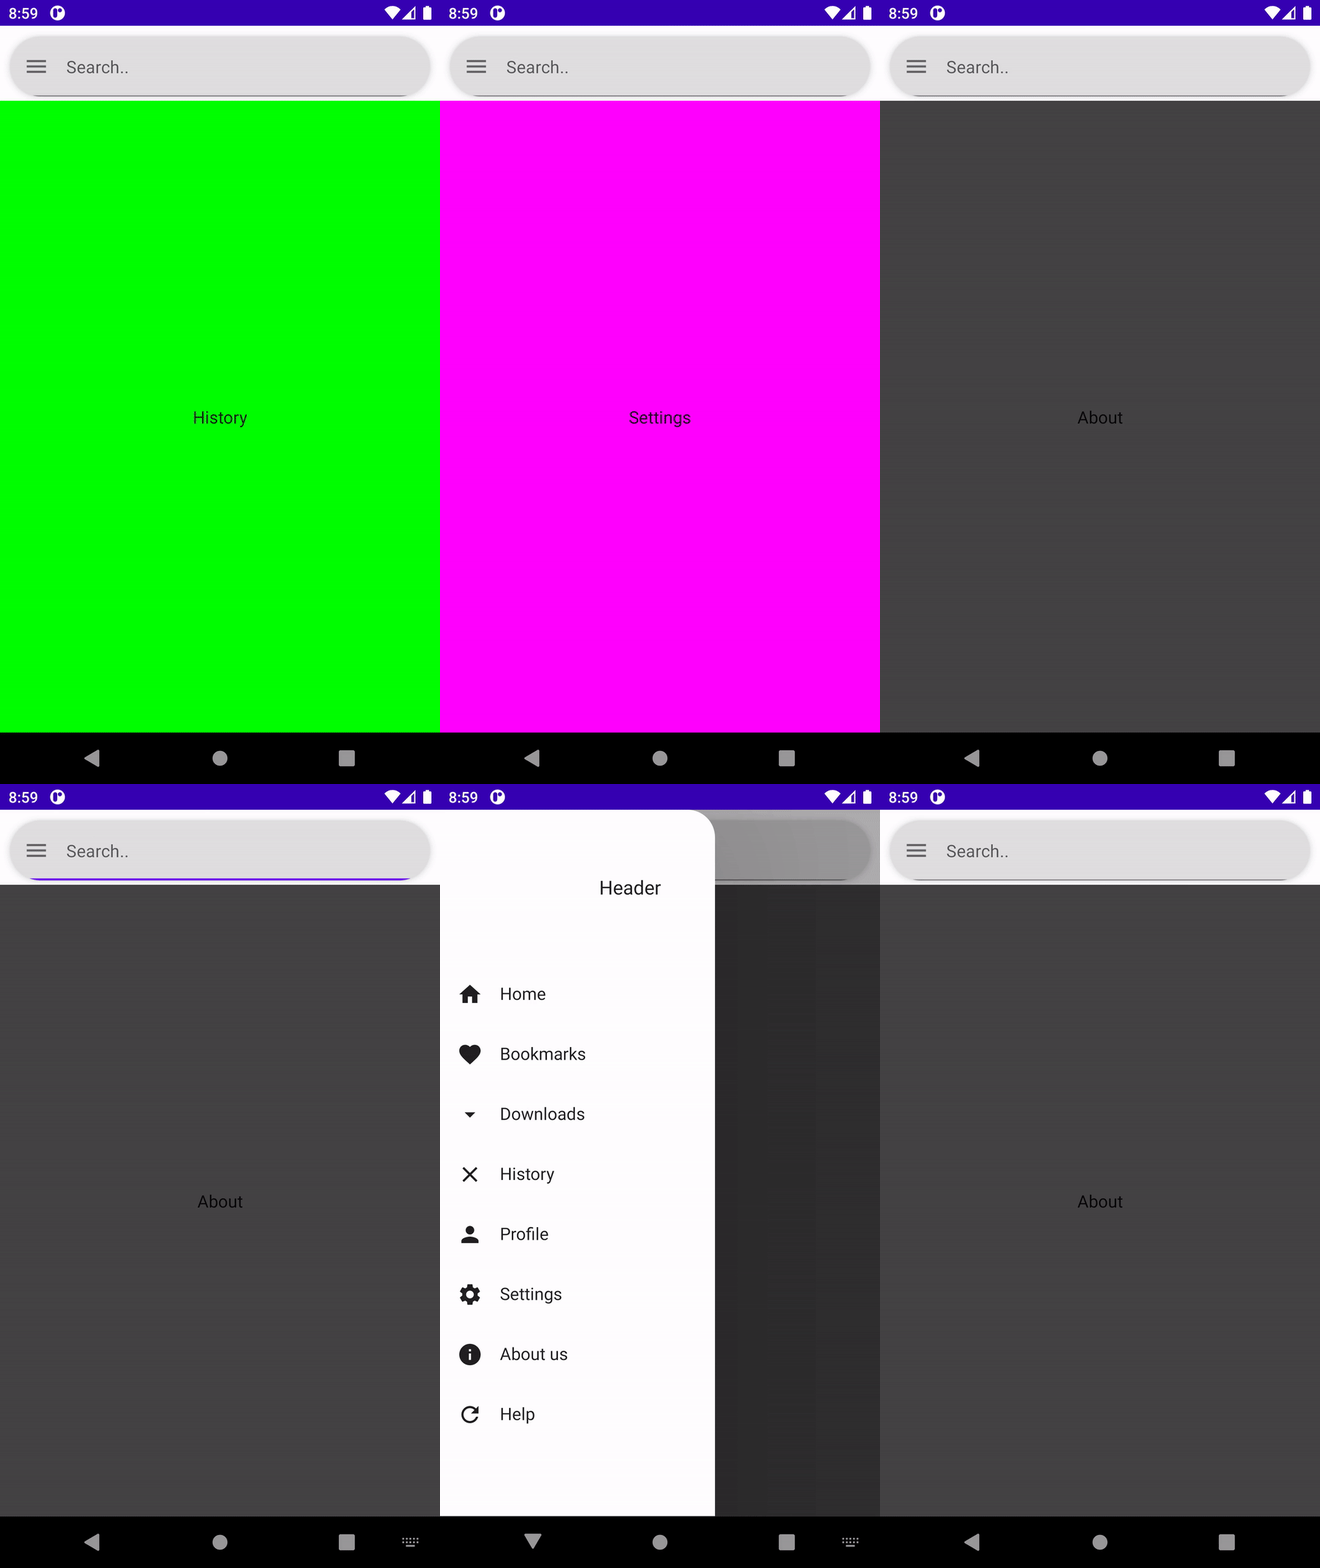
We are going to use the Jetpack Navigation component for Compose and create a Drawer with multiple destinations.
I will be directly creating the composables and explaining all the important things line by line in the comments.
Output:


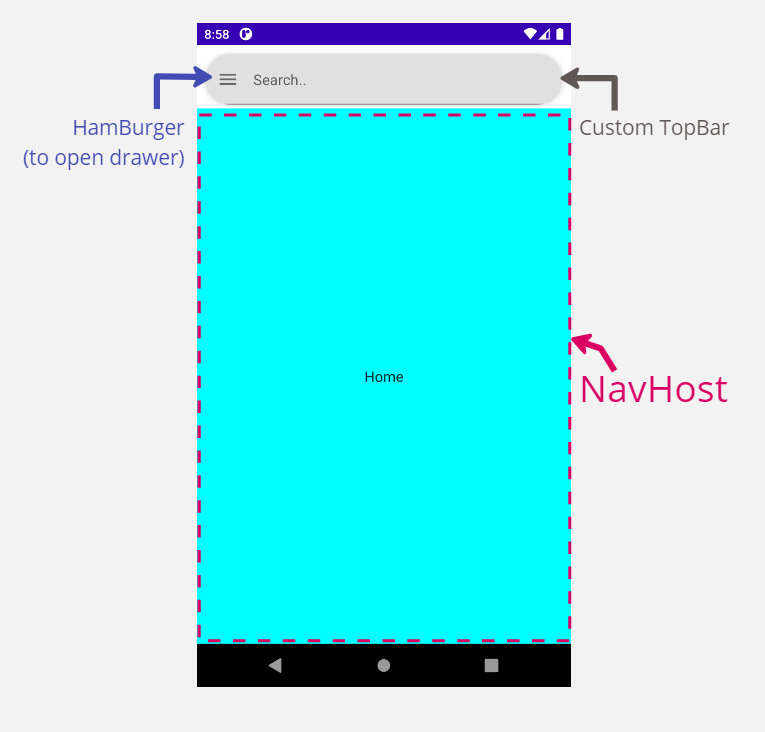
Design
Dependency:
//Add these to your build.gradle App module
def nav_version = "2.5.3"
implementation "androidx.navigation:navigation-compose:$nav_version"
Creating Drawer:
@Composable
fun Drawer(
    modifier: Modifier = Modifier,
    itemTextStyle: TextStyle = TextStyle(fontSize = 16.sp),
    onItemClick: (String) -> Unit = {}//Navigate on Clicking
) {
    LazyColumn(modifier) {
        item {
            DrawerHeader()//Just a text
        }
        items(screens) //Here, add a list of Screen Object
        { item ->
            Row(
                modifier = Modifier
                    .fillMaxWidth()
                    .clickable {
                        onItemClick(item.title)//pass the title as route to navigate
                    }
                    .padding(16.dp)
            ) {//Design for each Drawer Item
                Icon(imageVector = item.icon, contentDescription = item.title)
                Spacer(modifier = Modifier.width(16.dp))
                Text(
                    text = item.title,//Drawer Item name
                    style = itemTextStyle,
                    modifier = Modifier.weight(1f)
                )
            }
        }
    }
}
Defining Screens:
sealed class Screen(val title: String, val icon: ImageVector) {
    object Home : Screen("Home", Icons.Default.Home)
    object Images : Screen("Images", Icons.Default.Person)
    ...
}

internal val screens = listOf(
    Screen.Home,
    Screen.Bookmarks,
    ...
)// This is the list that we passed in drawer
Creating Scaffold:
You can also use ModalDrawer if you want to
//This is going to be the main and only function that we will call in our activity
fun AppScreen(
    scaffoldState: ScaffoldState,//use remember___() for all these
    navController: NavHostController,
    scope: CoroutineScope,
    imageViewModel: ImageViewModel = hiltViewModel())
{
    Scaffold(
        scaffoldState = scaffoldState,//must
        drawerGesturesEnabled = scaffoldState.drawerState.isOpen,//changing "swipe to open" functionality
        drawerContent = {
            //using our "Drawer" composable
            Drawer { route ->//OnItemClick here
                scope.launch { scaffoldState.drawerState.close() }//closing drawer before navigating
                navController.navigate(route) {//use the passed route to navigate
                    popUpTo(navController.graph.startDestinationId)
                    launchSingleTop = true
                }//Navigating to the clicked destination by passing the route
            }
        },
        //customizing the drawer. Will also share this shape below.
        drawerElevation = 90.dp,
        drawerShape = customDrawerShape(LocalConfiguration.current.screenHeightDp.dp.toPx())
    ) {//Here goes the whole content of our Screen
        val focusManager = LocalFocusManager.current
        //My custom search bar with leading HamBurger Icon
        ScreenHeader(
            onMenuIconClick = {//On Clicking HamBurger Icon
                focusManager.clearFocus()//Clearing focus from TextField
                scope.launch { scaffoldState.drawerState.open() }//Opening Drawer
            },
            fieldHint = "Search.."
        )
        NavigationHost(navController,imageViewModel)//NavHost for our screens
    }
}
Custom Drawer Design:
fun customDrawerShape(height: Float) = object : Shape {
    override fun createOutline(
        size: Size,
        layoutDirection: LayoutDirection,
        density: Density
    ): Outline {
        return Outline.Rounded(
            RoundRect(
                left = 0f,
                top = 0f,
                right = 900f,
                bottom = height,
                //You can also add bottomRightCornerRadius
                topRightCornerRadius = CornerRadius(x = 90f, y = 90f)
            )
        )
    }
}

//This extension function converts Dp value to Float Px value
@Composable
fun Dp.toPx(): Float {
    val density = LocalDensity.current.density
    return this.value * density
}
NavHost for Screens:
@Composable
fun NavigationHost(navController: NavHostController,imageViewModel: ImageViewModel) {
    NavHost(
        modifier = Modifier.padding(top = 70.dp),
        navController = navController,
        startDestination = Screen.Home.title
    ) {
        composable(Screen.Home.title) {
            Home()//Define Home screen(I used Text and Cyan color)
        }
        composable(Screen.Bookmarks.title) {
            Bookmarks()
        }
        composable(Screen.Downloads.title) {
            Downloads()
        }
        ...
    }
}
Only use the “navController” that we pass to/from our AppScreen because if you are using rememberNavController() everywhere, then it will be using different Instances at different places and then your app will not work as expected.
Final steps:
Our work is now completed and we just have to call AppScreen() in our MainActivity.
//In onCreate
setContent {
    MyAppTheme {
        val scaffoldState = rememberScaffoldState()
        val navController = rememberNavController()
        val scope = rememberCoroutineScope()
        AppScreen(scaffoldState,navController, scope)
    }
}
Our Flow will be like this:
Calling AppScreen -> Creating Scaffold -> Scaffold Adds TopBar(with Hamburger) & NavHost(for showing screens) -> Showing Home Compose as Default -> Hamburger opens the Drawer -> Click on Drawer Item -> Navigate to the Clicked Destination Compose(using the passed route).
I hope you found this helpful. If yes, then do FOLLOW me for more Android-related content.
#androidWithSagar #android #androiddevelopment #development #compose #kotlin
